
Aluminum Heatsink Case for Raspberry Pi 4 - Obsidian Black
12,60 €
Notify me when the item is available.
- Description
- Product information
- Assembly
Description
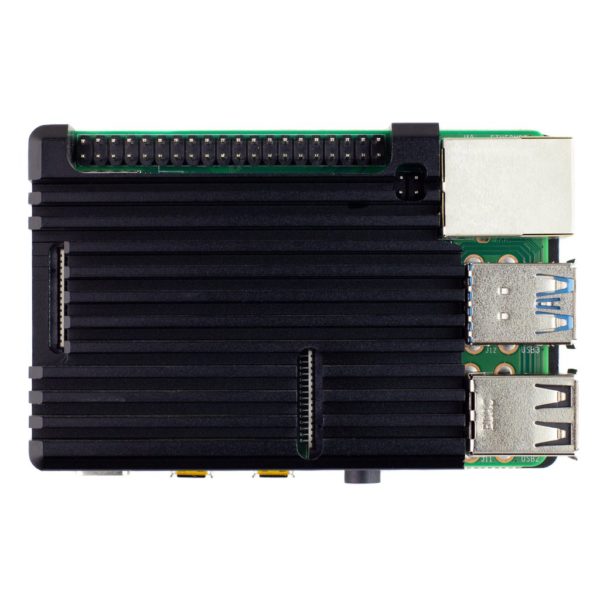
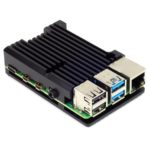
This anodised aluminum heatsink case will protect your Raspberry Pi 4 and give you the best passive cooling we've seen in our extensive testing. It's great for situations where you want completely silent cooling, like home media centers.
It comes with a thermal pad to provide thermal contact between the CPU and top case, and a handy allen key and set of hex bolts to attach the case together.
The case gives you access to all of the ports, pins, and connectors. You can fair about get away with using low-profile HATs and pHATs (those without bulky components on the underside), using one of ours booster headers, But be extremely careful not to short any components on the metal top case! The booster headers will stack in case you need to use two for chunky component clearance purposes.
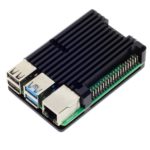
- Anodised aluminum top and bottom case
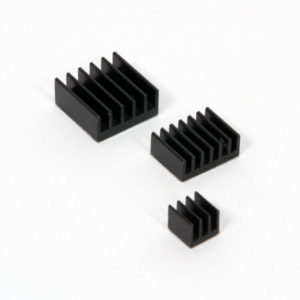
- Heatsink fin
- thermal pad
- Hex bolts and allen keys included
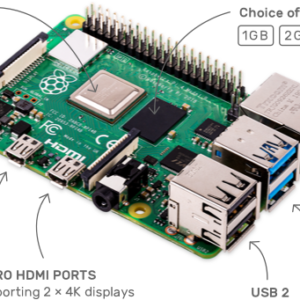
- Access to all ports, pins, and connectors
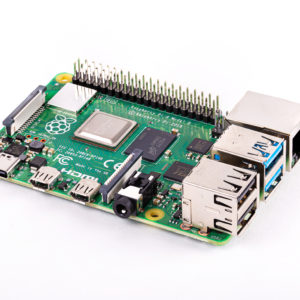
- Compatible with Raspberry Pi 4
Assembly
Follow the brief instructions below or see the Tab
Assembling your heat sink case it's pretty easy and should only take a couple of minutes. The first, and most important thing is to make sure that your Pi is powered off and unplugged before you fit the case.
Take one of the thermal pads and peel the protective films off both sides of it (there's a white film and an easy-to-miss clear film on the other side. Stick the thermal pad onto your Pi's CPU (the metal square nearest the middle of the PCB).
Sticking the thermal pad to the CPU first is a much better way to position it correctly than trying to stick it to the case. only use one thermal pad with the Raspberry Pi 4.
Position the top case and then, holding it in place, flip the whole thing over and position the bottom case on the underside of your Pi. Use the four hex bolts and allen keys to secure the case.
Notes
- The case it is metal and hence conductive, so be careful not to short any components on it, and ensure that your Pi is powered off and unplugged when fitting the case
- It may be obvious, but the case will get hot in use
- Dimensions: 87x56x25.5mm
Product information
| Weight | 0,2 kg |
|---|---|
| Length | 8x4x1 cm |
| BRAND | Pimorons |
| FEATURES |
Assembling the Heatsink Case
Our heat sink case for Raspberry Pi 4 is a really effective way to silently cool yours Raspberry Pi 4, and it looks pretty slick too. Let's learn how to assemble it!
Assembly takes just a couple of minutes, and all of the tools and bits you need are included with yours case.
Because the case is metal, and hence conductive, it's really important that you fit the case while your Pi is powered off and unplugged, otheriwse you'll risk shorting components against the case and damaging your Pi!

Attaching the thermal pad
Your case comes with a couple of thermal pads, that are used to make thermal contact between you Raspberry Pi 4's CPU, and the aluminum top case.
Notes that you'll just be using one of the thermal pads on the CPU! Keep the other as a spare.
The best way to apply the thermal pad is to stick it to the CPU on your Pi, rather than trying to stick it to the case, as there's no way you can position it wrongly this way.
Peel the protective film / paper off both sides of the blue thermal pad.
As well as the white paper on one side, there's a thin, clear plastic film on the other side, and it's important to peel this off too, to make proper thermal contact.
Stick the side that had the white paper on onto your Pi's CPU (it's the stickier of the two sides).


Fitting the case
The top case is the taller piece with the cutout for the Pi's GPIO pins. Position it on top of your Pi, with the posts lined up with the four mounting holes on your Pi.

Flip the whole thing over, position the bottom case (make sure the mounting holes are the right way round), and then screw in the four hex bolts using the little allen key that's included.

Your case is now fully assembled and ready to go!